Tuesday, January 31, 2012

Flowers of the Grass and Other Ponderings

"For the sun rises with its scorching heat and withers the grass;
its flower falls, and its beauty perishes. 
So also will the rich man fade away in the midst of his pursuits." 
James 1: 11 ESV

Daunting words.  I'm studying the book of James with a group from my church using Beth Moore's latest study guide: "James - Mercy Triumphs."  This time Beth threw out a challenge to memorize the book of James.  What?!?!  It's not required, but I was drawn to the challenge.  My normal thinking is that I cannot possibly do that.  Previous attempts to memorize topical verses has not been a great success.  I haven't disciplined myself to keep reviewing the verses to keep them fresh.  Occasionally, by the grace of God, a verse will come to mind when I need it.  So how did I think I could memorize a whole book of the Bible, let alone a chapter?

With God all things are possibleSeek, Ask, Find.

And by HIS grace, I have memorized chapter 1 and have my foot firmly planted into the beginning of chapter 2.

What happens to your mind when you are memorizing a complete passage is pure blessing.
It is joy.

Something else happens.  The Word is alive in all aspects of your life in a new way. Even art making.

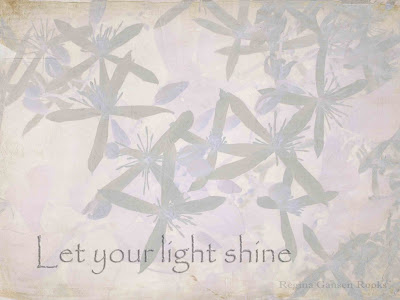
I skimmed through my image files looking for something that I could enhance with Kim Klassen's Simplicity Texture.  (Be sure to follow the link to Kim's site where each week she shares a texture.)
I was attracted to a group of images I shot one late autumn that were inspired by silhouettes and textures at a local park, and I hoped to use the shots for painting references.
The "Dead Heads" gave me a great digital palette.  The sky was a vast blank of nothingness.  Most of the detail of the image was lost to shadow, though not a perfect silhouette, giving me lost and found edges.

As I made adjustments to the image, cropped it and applied the texture layers, I remembered the Word that has been scrolling through my mind and falling from my lips over and over...

"Like a flower of the grass, he will pass away..."  James 1: 10b ESV.

I am reminded to share my blessings.

Saturday, January 21, 2012

How I Came To Call Myself an Artist


How do you know you are an artist?
When do you claim the title as your own?
When do you believe it?

It’s common that those around you can see quite plainly what is right in front of you. But you are blind to it.  Or, you see it through too many filters…

- unbelief

- false modesty

- pride

- fear

- comparison

Since I was a small child, I’ve delighted in making things. I’ve been attracted to beauty and nature and textures and colors and music. I didn’t just want to see them, I wanted to feel them. I never thought of myself as an artist, and the idea of being an artist wasn't even a reasonable thought.
Mom saw something in me and as Santa (or herself), she gifted me through the years with many crafts, teaching me to sew, embroider, cook and bake. She believed in me and even handed over the task of birthday cake decorating to me at a young age. She signed me up for junior high art class.
Even though I enjoyed learning techniques and working with art supplies, I was intimidated by other students whose art I considered to be better than mine.

By now I had convinced myself that I wasn’t an artist. Never really considered that I was one because I wasn’t good enough.
But I still liked to make stuff.

In college, my Home Economics curriculum included a basic art concepts class as a prerequisite for a required interior design class. Wow! I really felt out of my league. But I enjoyed the art exercises just for the pleasure of working with paint and scissors and glue.

A part time job in a needlework shop gave me ample opportunities to feed my creative spirit. I began the job with a few basic skills in embroidery and knitting. By the time I graduated college, I was managing the store, teaching a variety of stitchery classes and even helping to design very simple cross- stitch patterns! I took comfort in stitching detailed counted cross-stitch patterns because the designs and colors were already determined by the designer. I didn’t think I could draw, let alone paint anything as beautiful as these cross-stitch designs.

Over the years, I also played with quilting, custom sewing, and crafts. I taught myself jewelry making and started my business, RGR Designs.

But paint lured me. Oh yes it did! I told myself that when I was older (over 40), that I would take lessons. But in my early 30’s I took an adult ed watercolor class with less than impressive results. In the meantime, a great friend invited me over to paint on sweatshirts and wooden ornaments. Well, that wasn’t so bad. Designs were available that we transferred to the fabric, and patterns could be traced onto the wood. I could do that, so I was off and running. I was hooked and wasn’t satisfied painting simple folksy designs for long. I found instruction booklets using craft paints for flowers and even watercolor techniques.

Still, I was not an artist.

A local watercolor artist’s work caught my attention. She painted flowers with such intensity I could hardly believe my eyes. She was teaching an adult ed class and I signed up. Now I was learning to paint the way I had hoped. My skills with the medium needed lots of work, but I was headed in the right direction. In addition, I met a great group of women who also love to paint. We met regularly to paint and encourage each other.

Oh, surely I was an artist now. I belonged to a group of painters and we even showed our paintings in public.

Are you kidding ? I was convinced that for someone to call themself an artist, she must have her art hanging somewhere important or make lots of sales. That wasn’t me.

At this point, I developed some photography skills. I learned from the recent watercolor class that I really needed my own reference images. I was still stuck on the idea that I couldn’t draw well and therefore I needed to enlarge my images and trace them on the paper before I painted. I was also building my jewelry inventory and photographing it for promotion.

Without going into a lot of detail, this thread of art in my life was just a layer over deeper issues. A critical juncture was finding out that I would never give birth to a child, would never give my husband our offspring... Devastating to the heart of a woman. But the good news is that my heart belongs to Jesus Christ and He gives me the strength and the tools to overcome even this heart ache. In obedience to Christ, I began a daily practice of gratitude.

During my drive to work with nearly ten miles of rural landscape, over the course of several months, I observed elusive bits of beauty and gave thanks to God for them. That winter, I began to notice nuances of color in the dead landscape that had previously been all dull and grey to my eyes. For example, I delighted in seeing the shades of muted reddish brown in certain grass varieties and how lovely they appeared against the straw colors of other grasses.
Each day the sights were different with the changing angle of the sun or cloud cover.

Then one day on my way to work the truth hit me.
It was a gift of great significance.

i am an artist
I am an artist
I am an Artist
I Am An Artist
I AM AN ARTIST

I realized that I had been thanking God for artistic aspects of what I was seeing; the juxtaposition of complementary colors or analogous color schemes, texture and value contrasts, shapes, rhythm. I was processing what I saw through the lens of an artist and expressing my gratitude in those terms to the greatest artist, the Creator.

Thanking God for giving me joy through these elusive and often temporal glimpses had been the tool to open my heart more fully to God, and He helped me see and accept who He created me to be.

It feels good great to be able to say I am an artist.
By saying I’m an artist doesn’t mean I think my work is better or worse.
In fact, being an artist is not about what I make.
It’s about who I am. How I see the world and process it.

Having said that, as long as I remember who I am, then I am free to make art. I have fewer mental distractions than I did in the past. The self critic has not been totally silenced, but I am a work in progress.

I’ll continue to follow my curiosity, develop my skills and be an artist.

P.S.  After my great epiphany and  I started sharing my identity as an artist, you know what I heard most? "I knew that." 
Reminds me of the story about a girl who wore ruby slippers and woke up with a bump on her head.


 Note:  Image edited in PS Elements 4.0 and includes Kim Klassen's texture layer Evolve.
Friday, January 20, 2012

Tallcorn Towers Four Ways using PS Elements

Tallcorn Towers Four Ways
Today I learned a different way to convert color images to black and white. Then I made simple adjustments for a variety of effects.
My inspiration is a historical building in downtown Marshalltown.  I couldn't resist the name play of this building that is emphasized by the angle of this shot.  I edited out a street light that cluttered the right side of the composition.  Adding texture layers helped disguise some imperfections in that background edit.


Black and White adjustment layer.
I duplicated the background layer and used an adjustment layer to convert the color image to Black and White.  Using an adjustment layer gives you more editing options than converting the image using the Enhance menu.  That's just one of the many tips I've picked up from Kim Klassen.

Vintage Effect
 Since the black and white conversion was done to a layer, I could adjust it's opacity to let a bit of the original color come through.

Even more color comes through...
This image reminds me of old faded color photos that might be found in the back of a drawer.  I decreased the opacity of the Black and White layer even more to allow more color to come through than the previous image.
Let me remind you that there are additional textures and adjustments overlaid on the image.  The above shots are showing the differences from playing with the black and white layer.

Color fill layer added
I like the character that adding a color fill layer gave to the image.  Using the color picker tool, I selected a solid burnt orange hue from the bricks.  A layer of orange covered the whole image, but I greatly reduced its opacity.  This layer warmed up the cool tones and neutralized the sky area.  A painter would get a similar effect by painting a transparent colored glaze over their painting.

Be sure to check out Kim Klassen's web site.  She is starting a Photoshop Essentials eCourse in February and will be covering both PS Elements and Photoshop.  If my schedule wasn't already so full, I'd be taking that class.  Her videos are easy to understand and she is generous in providing practice images as well as free texture layers.  If nothing else, follow her blog.
You can see more of my recent editing at my Flickr photostream.  Thanks for your comments!
Oh yes, that IS a new blog banner at the top of the page.... same scripture with a different background (part of one of my paintings that sold).

Thursday, January 19, 2012

If opportunity doesn't knock, build a door.

I've been sorting through image files and playing with the new skills I'm learning from Kim Klassen.  You can still sign up for her Beyond Layers Year of Artful Inspiration.

This is an image I shot in Marshalltown, Iowa on a gorgeous Sunday afternoon when Hubby and I were admiring the architecture of its downtown area.  I was drawn to the color of the door and all the lovely texture created by the peeling paint.

Today I was challenged to choose a simple shot and alter it just enough....  After tweaking the light levels and hue saturation just a bit, I added Kim Klassen texture layers that were adjusted with blending modes.
Do you remember Milton Berle?  I thought his quote was just the right finishing touch.

Sunday, January 15, 2012

PS Elements Transformations with Skinny Mini eCourse

After PS Elements
I'm so excited about the Photoshop Elements tips I've been picking up from Kim Klassen.  Kim offers eCourses and texture layers.  The above image was created using techniques I gleaned from Kim's Skinny Mini eCourse. 
Before PS Elements
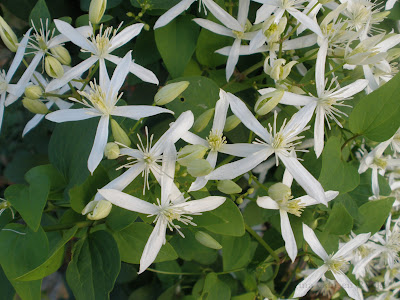
I used this image of a fall blooming clematis that I shot last fall.  One of Kim's textures was layered two times with a different blending mode applied to each layer.

Enhanced with PS Elements.
This is another "homework" project.  It's amazing what a few tweaks will do for an image.

Friday, January 6, 2012

Photoshop Elements Joy in 2012

Scanned monoprint edited with texture layers in PS Elements.
Making art gives me joy.  The creative process stimulates my heart and my mind.  I'm so excited to share with you on my blog after a three month hiatus. 
I've been OK, but many family events absorbed much time.  There have been celebrations and a farewell.  Through it all, the joy of the Lord has been my strength.

This Fall my sister introduced me to the Kim Klassen Cafe.  WOW!  If you enjoy digital editing and textures, don't walk... run to Kim's site.  She has plenty of free textures and techniques as well as very reasonably priced on-line workshops.  I signed up for her Beyond Layers class.  This is one step toward my goal of developing my line of edited images.  I have plenty of painted and photographed textures that I am learning to convert to texture layers.

Today's image started with a scan of a monoprint I created for a Green Pepper Press Crusade Challenge.  By using some of Kim's free texture layers and manipulating them with effects, I enhanced the print.  By adding text in a separate layer, I can change the message at will.

A bit of great news came to me in the past couple weeks.  For the second time, I've had work accepted in a national art exhibit.  The digital image "Swan Love" will be on display at the Octagon Art Center in Ames, Iowa from January 27, 2012 through April 7, 2012.  To say I am thrilled is an understatement.

Thanks for following my blog.  I intend to post more regularly.  Blessings to you in 2012!